Plunder and Destroy: 12 of History’s Most Daring Raids

Plunder and Destroy: 12 of History’s Most Daring Raids

Khalid Elhassan - October 21, 2017

A raid is an armed mission by a relatively small group of attackers, prepared in secret with the hope of surprising and catching the enemy off guard, inflicting damage, then withdrawing before the adversary has time to react and bring superior numbers to bear against the raiders and overwhelm them. Raids typically seek to destroy vital enemy installations or goods, kill important enemy personnel, gather intelligence, loot, ransack, plunder, and otherwise confuse and demoralize the foe.

Usually, raids seek to harm the enemy without capturing or holding terrain, although that is not always so – sometimes a raid could be intended to capture a vital objective and hold it for a limited period of time until bigger and more heavily armed units can arrive to secure and consolidate what the raiders had seized.

Raiders could be specially trained warriors, such as special forces and commandos specially trained for raiding operations, or a normal military unit or ad hoc collection of non-specialty trained warriors assigned a special particular task.

Typically a feature of irregular warfare, raids could also be integrated into standard warfare when conducted to seize and hold an objective long enough for the arrival of follow-up regular military units.

Following are twelve of history’s most remarkable raids.

Raid on the Medway

The Raid on the Medway was a surprise attack by the Dutch navy which caught England’s Royal Navy off guard when it brazenly sailed up the Medway River in Kent to attack English battleships anchored in dockyards at Chatham and Gillingham. It took place between June 9-14th, 1667, during the Second Anglo-Dutch War (1665-1667), and resulted in one of the most impressive victories in Dutch history.

Plunder and Destroy: 12 of History’s Most Daring Raids
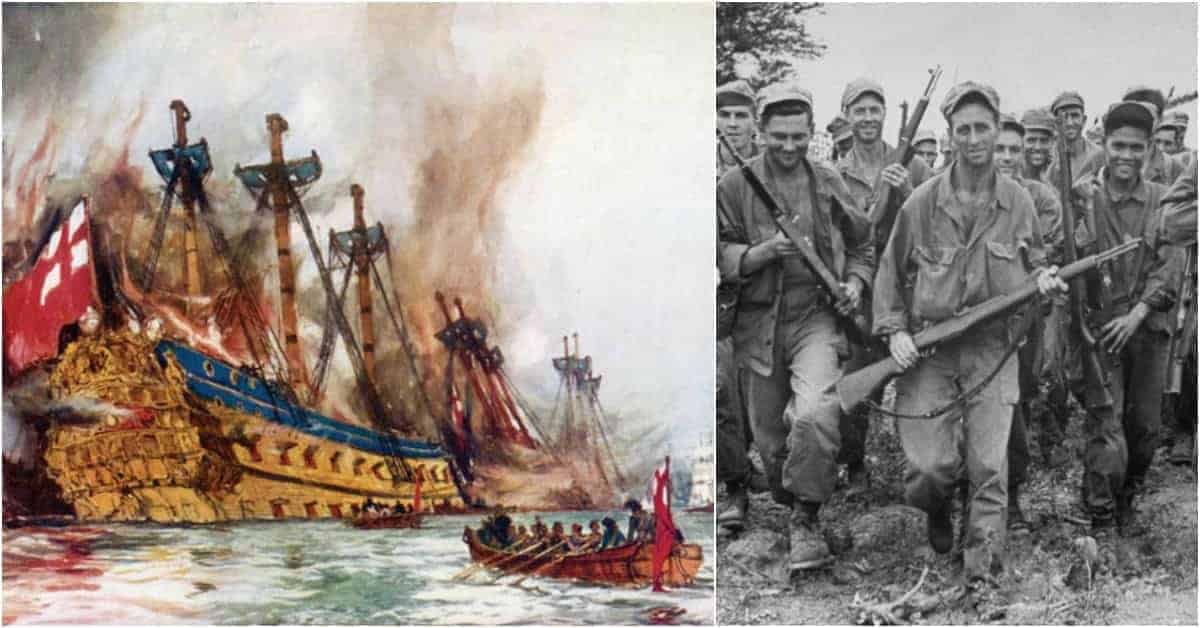
Dutch navy burning English warships at Chatham, by Jan van Leyden. Sailing Warships

Things had not been going well for England since the start of the Second Anglo-Dutch War in 1665, as it suffered first the Great Plague that ravaged London in 1665-1666, then the Great Fire of London in 1666. By 1667, England’s King Charles II was broke, unable to pay sailors, and desperately wanted out of the war. The Dutch, however, smarting from an earlier loss of the First Anglo-Dutch War, wanted to first inflict a crushing defeat on the English to even the score, which would then place them in a strong position to impose punitive peace terms on England.

To secure said crushing victory, the Dutch fleet, commanded by one of history’s greatest admirals, Michiel de Ruyter, entered the Thames estuary and bombarded and captured Sheerness at the mouth of the Medway. The attackers then sailed up that river, overcoming both a barrier chain stretched across its waters, which Dutch engineers overcame with ease, as well as fortresses along the way that were intended to protect the English battleships anchored at Chatham and Gillingham.

Upon reaching the anchored ships laid up in their dockyards, virtually unmanned and unarmed, the Dutch burned three capital ships and ten smaller warships, and captured and towed away as prizes two major ships of the line, including HMS Royal Charles, the flagship of the Royal Navy, named after the reigning king. In total, the Royal Navy lost 13 ships, while the Dutch lost none.

In addition to the serious material losses, the public demonstration that the English were unable to protect their own coastline, or their own fleet within their own borders, resulted in one of the greatest humiliations ever suffered by the Royal Navy and England. So great was the debacle that there were rife speculations about the imminent collapse of the monarchy, which had been restored only seven years earlier after a decade of rule without king during the period of the English Commonwealth.

Chagrined, broke, with a monarch seated atop a tottering throne, the English hurried to sign a peace treaty favorable to the Dutch the following month and exited the war.

Plunder and Destroy: 12 of History’s Most Daring Raids
End of the Great Locomotive Chase, as raiders disembark and scatter into the wilderness. Civil War Forum

The Great Locomotive Chase

In early 1862, Union forces had to account for the possibility of Confederate forces rapidly arriving at Chattanooga from Atlanta via the Western & Atlantic Railroad (W&R). James J. Andrews, a Union civilian scout, proposed a raid to sever that rail connection by seizing a locomotive in Georgia, then traveling north, destroying two connecting railway lines and their vital bridges.

The idea was approved, and in early April, Andrews recruited Union Army volunteers for his raid. Slipping through Confederate lines in civilian clothes, the men were to rendezvous in Marietta, Georgia. There, they boarded a train on April 11th, and when it reached a small stop called “Big Shanty”, selected by Andrews because it had no telegraph the Confederates could use to send out an alarm, the raiders sprung into action. Seizing the train’s locomotive, named the General, they uncoupled it from the rest of the train and took off, beginning the chase.

The raiders cut telegraph lines, and stopping along the way, removed some rail tracks. When a hue and cry were raised, the raiders led Confederate pursuers on a 90-mile chase on foot and on locomotives. In Big Shanty, the conductor whose locomotive they had hijacked, a William Fuller, organized a pursuit.

First by foot, then by handcar, until Fuller and posse reached an idle locomotive on a spur line, which they fired up and began the chase in earnest. Switching locomotives along the way, Fuller and the pursuers steadily closed the distance with Andrews and his raiders.

For some time, Andrews’ men managed to stay ahead of news of their raid because they had cut telegraph wires, thus preventing warnings and orders to block the raiders’ escape route from reaching Confederate forces ahead of the fleeing Union volunteers.

Things started going wrong for the raiders when they tried burning a wooden railroad bridge, but heavy rains had left the structure too waterlogged to catch on fire, so Andrews and his moved on, leaving the bridge intact behind them – and giving the pursuers a clear path to follow them on a stern chase.

When the pursuers finally reached an intact telegraph line, they managed to sound the alarm, and the raiders were blocked. Halting the train on the outskirts of Ringgold, Georgia, Andrews ordered his men to disembark and scatter into the wilderness. They were captured over the next few days, then tried by the Confederates for “acts of unlawful belligerency”.

Andrews and seven of his men were convicted and hanged in June of 1862. Eight of the raiders, however, managed to escape, and the remainder were released in a prisoner exchange in March 1863. Participants were among the first-ever recipients of the newly created Congressional Medal of Honor, but unfortunately, Andrews was not among them, because, as a civilian, he was ineligible.

Plunder and Destroy: 12 of History’s Most Daring Raids
Route of Grierson’s Raid. Warfare History Network

Grierson Raid

On April 17th, 1863, Union Colonel Benjamin Grierson led a cavalry brigade of 1700 horsemen out of La Grange, Tennessee, and took them southward to plunge deep into Mississippi in a raid that would traverse the length of that state, and reemerge at the other side and the safety of Union lines in Baton Rouge, Louisiana.

En route, the Raiders sought to discomfit the enemy and disrupt his communications by tearing up railroad tracks, destroying bridges, wrecking and destroying Confederate installations and facilities, and otherwise wreak havoc and sow confusion throughout Mississippi.

In addition to the damage inflicted, both physical and to the enemy’s morale, the raid was to be the opening salvo of the Vicksburg Campaign, with the strategic aim of acting as a diversion from General Ulysses S. Grant’s planned attack against Vicksburg, Mississippi. Also, until then, Confederate cavalry had been markedly superior to that of the Union, literally riding circles around them.

Thus, an additional motive was to demonstrate what federal horsemen could do with a daring exploit of their own to match the headline-grabbing ones of Confederate cavalrymen J.E.B. Stuart and Nathan Bedford Forrest.

Commanded by a former music teacher who hated horses, Grierson’s cavalrymen traveled light, packing only 5 days’ worth of rations for what planners envisioned would be a 10-day mission, 40 rounds of ammunition, and oats for their mounts. Preceded by scouts in enemy uniform, they rode for 600 miles through the heart of enemy territory that had never before seen enemy soldiers or felt the touch of war.

Mississippi felt it now, and went into a panic as Union horsemen burned storehouses, tore up railroads and twisted them atop burning crossties, freed slaves, wrecked bridges, destroyed trains, and put commissaries to the torch. Throughout, Grierson added to the Confederates’ confusion by peeling off detachments and sending them on feints to baffle and confuse the enemy about his actual whereabouts, intentions, and direction of march.

The raid was a smashing success, literally as well as figuratively. Rampaging at will for 15 days deep in the heart of enemy territory, Grierson’s cavalrymen wreaked significant damage upon the enemy property and enemy morale. Although vigorously pursued by Confederates, the Union cavalry eluded their pursuers while causing mayhem in the enemy’s heartland.

After a 15 day rampage during which they lost only 3 killed, 7 wounded, and 9 missing, the federal horsemen crossed into the safety of Union lines near Baton Rouge, Louisiana.

In addition to its immediate impact, the raid’s demonstration of Union soldiers’ ability to live off the land within Confederate territory started the gears turning in the mind of Union General William Tecumseh Sherman about the vulnerability of the Confederacy’s interior, which he compared to soft innards surrounded by a brittle shell. A year and a half later, those turning gears would lead to the March Through Georgia and the even more devastating March Through the Carolinas that would seal the Confederacy’s doom.

Plunder and Destroy: 12 of History’s Most Daring Raids
German paratroopers during the assault on Fort Eben-Emael. History Net

Fort Eben-Emael

Constructed between 1931-1935, Fort Eben-Emael on the Belgian-Dutch border was designed to defend Belgium against a German attack. Positioned in a strategic location astride the likeliest German invasion route, with artillery dominating vital bridges and roads leading into Belgium, Eben-Emael was the world’s largest fortress, reputed to be impregnable and the toughest military stronghold on earth. 80 German paratroopers captured it and its 1200 defenders in 24 hours, in a daring assault on May 10-11, 1940.

In the pre-dawn hours of May 10th, 1940, at the start of the German blitzkrieg against the Netherlands, Belgium, Luxemburg and France, a company of 80 elite German Fallschirmjaegers, or paratroopers, under the command of Hauptman (Captain) Walter Koch, boarded gliders tethered to Ju 52 transport airplanes, which towed them to the vicinity of Eben-Emael and released them on an approach path to the fortress.

The gliders landed atop the fortress, which had been built to thwart attacks from land, but whose designers had not contemplated a direct assault from up above by airborne soldiers. Exiting the gliders and quickly forming into assault teams, the German paratroopers threw explosives down Eben-Emael’s ventilation shafts to explode within the fortress’ vitals. With an aggressive display of shock tactics, in which flamethrowers featured prominently, the Germans soon paralyzed the defenders, who found themselves trapped inside a fortress whose exits had been blocked.

Unable to effectively fight back against attackers who rained explosives down upon them from above, followed by aggressive room clearing tactics with which the garrison was unfamiliar and against which it had not trained, the demoralized defenders were steadily pushed deep into the bowels of the fortress, and away from the guns commanding the roads and bridges leading into the Belgian heartland.

With the guns unmanned, other paratroop units seized and secured the vital bridges Eben-Emael had been built to safeguard. The paratroopers suffered heavy casualties but stubbornly held on to the bridges, beating back Belgian counterattacks long enough for relief to arrive from regular German army units that raced from their jump-off positions to secure the objectives seized by the paratroopers.

Inside Eben-Emael, their situation now hopeless, the garrison surrendered early in the morning of the following day, May 11th, within 24 hours of the gliders’ landing atop the fortress.

Plunder and Destroy: 12 of History’s Most Daring Raids
British Commandos in landing craft en route to Bardia. Wikimedia

Bardia Raid

On the night of April 19-20, 1941, British raiders from No. 7 Commando, backed by a small tank contingent and supported by a small detachment comprised of a cruiser and three destroyers of the Royal Navy, launched a surprise amphibious landing at Bardia, a small coastal town in eastern Libya near the Egyptian border. Their mission was to disrupt the enemy rear by destroying an Italian supply dump and an artillery installation, which they accomplished despite losing 71 men.

In January, 1941, a 2000 man task force of Commandos, designated Layforce after its commander, Colonel Robert Laycock, was gathered in Britain and sent to Egypt, where it began training for special operations. An amphibious landing and raid on Bardi was to be their first mission, but it did not go smoothly: poor intelligence, inadequate foresight by planners, and mistakes on the ground caused more losses than enemy action.

Things got off to an iffy start when the raiders were landed at night behind schedule and on the wrong beach. However, they managed to sort things out and find their way to Bardia, which they were surprised to discover was lightly defended. They located and destroyed an Italian supply dump, as well as an artillery installation, all for the loss of a single officer, mistakenly killed in a friendly fire incident.

The raiders then trudged back to the beach for re-embarkation – and that was when poor preparation bit the raiders: a contingent of 70 Commandos got lost in the dark, and after a cascade of mishaps ended up going to the wrong beach, where they waited futilely for boats to pick them up. They were left behind, and all were captured by the enemy in the following days.

Notwithstanding the poor planning and resultant mishaps, it was a success. It did succeed in disrupting the enemy rear, destroyed its assigned targets, and as an added bonus, caused the Axis high command to pull a German armored brigade from the front lines and divert it to provide rear security.

That had a significant impact on the battlefield, as the British at the time were being hard pressed by the recently arrived Afrika Korps, under the command of Erwin Rommel. The diversion of a German armored brigade from the front lines eased the pressure and gave them enough breathing space to stabilize the situation.

Plunder and Destroy: 12 of History’s Most Daring Raids
Alexandria harbor at time of the raid. Defense Media Network

Raid on Alexandria

On December 3, 1941, an Italian submarine left La Spezia, Italy, carrying three manned torpedoes. Stopping at the island of Leros in the Aegean, the submarine picked up three crews of two men each to man the torpedoes, then set course for the harbor of Alexandria, Egypt – the British Royal Navy’s Mediterranean headquarters and main base – to conduct one of WWII’s most daring attacks, carried out with great skill and courage.

The raiders were members of the Italian Decima Flottiglia MAS, or “10th Assault Vehicle Flotilla” – an Italian navy unit of commando frogmen. Their manned torpedoes were 22 feet long, battery-powered, with a speed of 2.5 miles, and a range of 10 miles, a submersible depth of about 100 feet, and a detachable 660-pound explosive charge. On December 19th, 1941, the submarine carrying them got to within a mile and a half of Alexandria’s harbor then launched torpedoes and frogmen on their way.

Through aerial reconnaissance and agents in Alexandria, the Italians had an accurate picture of the harbor’s defenses, which included shore artillery and machinegun emplacements, minefields, net barriers, and intense patrolling on water as well as ashore. The sole entrance was sealed with an antisubmarine net that was only removed to allow authorized vessels to enter or exit the harbor.

The raiders lurked underwater near the entrance to the harbor and snuck in when the barrier nets were temporarily removed to allow three British destroyers to enter. The frogmen quickly followed the destroyers in. Steering their manned torpedoes, the crews separated, each to their assigned target – the battleships HMS Valiant and Queen Elizabeth, and an aircraft carrier that turned out not to be present, so the crew assigned to attack it settled on the tanker Sagona, instead.

Plunder and Destroy: 12 of History’s Most Daring Raids
Manned torpedo such as that used by the Italian frogmen in Alexandria. Wikimedia

The raiders evaded the extensive protections within the harbor, maneuvering their vessels above or below torpedo nets until they reached their targets. Diving beneath their ships, the frogmen removed the warheads from their torpedoes, affixed them to the bottom of the enemy hulls, set timers for the explosives to go off at 6 am, and beat a retreat. One crew was spotted and captured as soon as they surfaced inside the harbor, while the other two crews swam ashore and made it into Alexandria, but were captured by Egyptian police within a few days.

The explosives went off on time, and both battleships suffered extensive damage that kept them out of action for a year, while the tanker was destroyed, and a destroyer refueling from it at the time suffered significant damage.

Plunder and Destroy: 12 of History’s Most Daring Raids
Tatsinskaya-based German Ju 52 transports en route to airlift supplies to the besieged Germans in Stalingrad. eBook Fiebere

Tatskinskaya Raid

The Tatsinskaya Raid, also known as “Red Christmas” or the “Christmas Raid” because it took place on Christmas Eve, December 24th, 1942, was a Soviet armored raid deep into the German rear to destroy the Tatsinskaya airfield, from which Luftwaffe transport planes were frantically airlifting supplies to the besieged German 6th Army in Stalingrad. Planes flying out of that airfield were the surrounded Germans’ only lifeline, so its destruction, and the irreplaceable Ju 52 transport planes therein, would seal the besieged 6th Army’s doom.

The raid, conducted by the 24th Tank Corps, struck the airfield from three sides and caught the Germans by surprise. T-34 tanks rolled down the tarmac, machine-gunning and shelling facilities and installations, as well as the precious planes – some still in crates on railway cars that had recently brought them to Tatsinskaya.

When the T-34s ran low on ammunition, they simply rammed the airplanes, smashing through their aluminum frames and crushing them and their engines beneath tens of tons of armor. German pilots and crews, desperately racing to their airplanes in an attempt to get them airborne and away to safety, were ruthlessly cut down or ran down and ground into pulp beneath tank treads.

The attackers were cutoff, however, and found themselves encircled and unable to break out back to Soviet lines. They suffered heavily, as the 24th Tank Corps lost most of its tanks, was nearly destroyed and had to be reconstituted. The task, however, had been accomplished, and the result was a Soviet strategic victory: the attackers claimed 300 aircraft destroyed, while the Germans admitted to the loss of 72 irreplaceable Ju 52 transport planes.

Whatever the figure, the destruction of the airfield and the loss of transport planes and their trained pilots, crews, and maintenance personnel was severe enough to seal the fate of the Germans surrounded in Stalingrad. The supply situation of the besieged 6th Army, already dire before the raid, when the Luftwaffe transport arm had been operating at full capacity, now became impossible after the destruction of so many transports and their base of operations.

With aerial resupply virtually cutoff, German resistance inside Stalingrad began to crumble, and the last survivors were forced to capitulate a month later in the greatest German defeat of the war until then. That outcome in turn altered the balance of the conflict, placing the Germans in the strategic offensive, and the Soviets in the strategic offensive that culminated two years later with the Red Banner raised over the German Reichstag in Berlin.

Plunder and Destroy: 12 of History’s Most Daring Raids
British Commandos bursting into Rommel’s villa. Pinterest

Operation Flipper

Operation Flipper was a daring British Commando raid carried out on the night of November 17-18, 1941. Had it succeeded in its objective of killing or capturing its target, it would have nipped the career of Afrika Korps commander Erwin Rommel in the bud, and reduced him to a bit of historic trivia and footnote before he had fully established himself as a warfare legend.

The raid was a prelude intended to disrupt the Axis command on the eve of Operation Crusader, an ambitious British offensive intended to lift the siege of Tobruk and relieve a mostly-Australian garrison that had been cut off and surrounded there during a British retreat, and eliminate the Axis threat to Egypt and the Suez Canal once and for all. It was thought that eliminating the brilliant German general who had chased the British out of Libya and led the Axis to Egypt’s border would be a good start.

To that end, Commandos were directed to kill or capture Rommel at his residence in a headquarters villa in the Libyan town of Bayda; destroy a nearby intelligence center and wireless station; attack the nearby headquarters of an Italian division, and otherwise attack and destroy targets of opportunity in the vicinity.

On November 10, 1941, two submarines set out from Alexandria, Egypt, carrying a force of 59 Commandos between them. They reached their landing site on the night of November 14th, where an advance team that had been parachuted in earlier awaited them. One submarine landed its contingent, but the other was struck by a squall and ran aground, with the result that only 7 of its Commandos reached the shore, while the remainder were stranded. With the available attack force thus drastically diminished, the mission was redacted and reduced to only attacking Rommel’s headquarters and that of the Italian division.

The Commandos set off to their targets on the 15th, and despite heavy rains, reached their attack positions on the night of November 17. At midnight, they struck in a meticulously executed attack – and discovered they had been acting on poor intelligence: Rommel was not at the HQ, but was in Italy, where he had been since November 1.

He would not return to the field until November 18 – the day after the raid. Only 3 German supply officers and an enlisted soldier were killed, and a fuel depot was destroyed. In exchange, the raiders were wiped out, with only two members managing to evade pursuit and reach British lines 37 days later. All the rest were either killed or captured.

Plunder and Destroy: 12 of History’s Most Daring Raids
Photo taken by Germans of the British destroyer that rammed and came to rest atop the Normandie dry dock gates. Falmouth

St Nazaire Raid

Operation Chariot, or the St Nazaire Raid, was a surprise attack launched by British Commandos and the Royal Navy on March 28, 1942, against the Normandie dry dock in St Nazaire, on the Atlantic coast of German-occupied France. That dry dock was the only Axis-controlled one on the Atlantic that could accommodate the giant German battleships Bismark and Tirpitz.

Its loss would ensure that should those battleships break into the Atlantic Ocean and suffer damage there, instead of returning for repairs to a convenient haven on the Atlantic, they would be forced to return all the way back to Germany, which could be reached from the Atlantic only by running the gauntlet of British-controlled waters in either the English Channel or the naval chokepoints of the Greenland-Iceland-UK (GIUK) gap to the north of Scotland.

A raiding party of Commandos in a flotilla of 18 small craft, intended to be the raiders’ ride back home after completion of their mission, plus an obsolete destroyer, HMS Cambeltown packed with well-concealed delayed-action high explosives, sailed from British ports down the English Channel and into the Atlantic, and set course for St Nazaire. Upon reaching the target, the Cambeltown rammed the gates of the Normandie dry dock and came to rest above them at an angle.

The Germans, unaware of the destroyer’s deadly cargo, concentrated on fighting the Commandos, who had disembarked to attack and destroy other vital installations, facilities, and machinery around the port. In the ensuing heavy exchanges of fire, the Germans destroyed nearly all the British small craft that were supposed to take the Commandos back home, leaving them stranded. They attempted to make their way inland, but most were killed or captured after their ammunition ran out.

The Raiders suffered heavy losses: 169 were killed, and another 215 were captured, in addition to the loss of 13 motor launches, a torpedo boat, a gunboat, and two airplanes. It was worth it, however, and the mission became a resounding success, literally, later that day. Just when things had quieted down and the Germans began cleanup efforts, swarming aboard the HMS Cambeltown resting at an angle above the dry dock gates, the delayed action explosives within the destroyer detonated.

The massive explosion not only killed hundreds of Germans and wounded hundreds more, but also accomplished the mission’s primary objective: it put the Normandie dry docks out of commission for the remainder of the war, and for five years more beyond that.

Plunder and Destroy: 12 of History’s Most Daring Raids
Avro Lancaster of 617 Squadron practicing the skip bombing of drum explosives. Imperial War Museum

The Dambusters Raid

On the night of May 16-17, 1943, a specially trained bomber unit of the Royal Air Force, the 617 Squadron, flew 19 modified Avro Lancaster heavy bombers in a dangerous raid that utilized innovative weapons and deployed them with highly unorthodox tactics to attack three dams in the Ruhr Valley, the heart of German industry and wartime production. The dams were protected by torpedo nets to shield them from torpedo attacks, and no aircraft or delivery mechanism existed at the time to accurately drop a conventional bomb big enough to do damage.

An innovative British scientist, Barnes Wallis, came up with an unconventional solution: skipping a bomb across the water like a stone, thus bypassing the torpedo nets by going over them, until it struck the dam, at which point it would sink, and going off at a predetermined depth, the surrounding water would concentrate the blast energy against the dam’s wall, rupturing it and causing a breach.

Barnes Wallis then developed a drum-shaped explosive and affixed it to a motor in the bomb bay to make it spin counter-clockwise. Dropped at a precise height by a bomber flying low at a set speed, the drum would skip on the water’s surface, hit the dam’s wall, with the rotation causing it to sink while hugging the wall, against which it would explode at a predetermined depth.

Elite pilots from RAF Bomber Command were reassigned to 617 Squadron, specially formed under the command of Guy Gibson, a highly competent Wing Commander, and trained rigorously on the flying technique necessary to utilize Barnes Wallis’ special weapon. On the assigned night, the raiders flew low on a hazardous zigzag route intended to avoid known concentrations of antiaircraft guns, and losses started piling up long before the bombers neared their targets.

Before crossing the coast into Europe, one Lancaster was forced to turn back after it flew too low and struck the North Sea’s surface, losing its explosives. A second soon followed suit after its radio was destroyed by ground fire. A third crashed after running into electric power lines, a fourth was destroyed when it ran into an electric tower, and a fifth was shot down.

The survivors reached the first dam, where Gibson launched the opening attack in the teeth of heavy antiaircraft fire, then flew across the dam multiple times to draw enemy fire and distract the gunners from the following Lancasters, which attacked in turn, losing one bomber while another suffered heavy damage before the dam was finally breached and a wall of water came pouring out to sweep and flood all in its path below. Gibson then led the Lancasters that still had bombs against a second dam, which they also breached, causing yet more havoc and destruction.

The third dam survived intact. For his valor that night, Guy Gibson won a Victor Cross, and for their daring exploit, 617 Squadron earned the nickname “Dambusters”, by which they are known to this day.

Plunder and Destroy: 12 of History’s Most Daring Raids
Son Tay prison camp. Wikimedia

Son Tay Prison Raid

On the night of November 20th, 1970, a raiding force of 56 US Army Special Forces, or Green Berets, boarded HH-3E “Jolly Green Giant” and HH-53E “Super Jolly Green Giant” helicopters that flew them from a staging base in Thailand to execute Operation Ivory Coast, a daring rescue mission to free an estimated 65 American prisoners of war held at Son Tay prison camp, about 20 miles west of the North Vietnamese capital of Hanoi.

It was an exceptionally hazardous operation, in which speed and precision of execution were extremely important: there were an estimated 12,000 North Vietnamese soldiers stationed within 5 miles of the camp, so it was vital that the raiders complete their mission quickly, and be gone before the enemy had time to react and bring overwhelming numbers to bear.

Three raider teams landed in Son Tay, with the first intentionally crash-landing its helicopter at 2:19 am in the middle of the camp to get into position as quickly as possible. A second helicopter mistakenly landed 400 yards away, at the guards’ headquarters. Its Special Forces attacked the headquarters and killed or wounded an estimated 100 guards. The third helicopter disembarked its attackers outside the camp complex, who rapidly secured the perimeter, then helped secure the camp’s facility.

The raid was a brilliant tactical success, and wholly accomplished its objective of seizing control of the camp within minutes of touching down, with the attackers sustaining only two injuries: one shot in the leg, while another broke an ankle. There were no prisoners to rescue, however.

As it turned out, the mission had been planned based on outdated intelligence: the POWs had been moved months earlier from Son Tay, which was adjacent to a river that the North Vietnamese feared was prone to flooding, to another prison camp. Within 26 minutes of landing, the raiders were airborne again, en route back to base.

Plunder and Destroy: 12 of History’s Most Daring Raids
Blueboy assault team which deliberately crash-landed in the center of Son Tay camp, the faster to execute its mission. Psy Warrior

While a tactical success, the mission was clearly an intelligence failure by the Defense Intelligence Agency (DIA) and other entities involved in the gathering and dissemination of the information upon which the assault was planned. In the raid’s aftermath, criticism of the faulty intelligence that led to a risky operation to rescue prisoners from a prison camp that held no prisoners led to an extensive overhaul and restructuring of the intelligence apparatus.

Plunder and Destroy: 12 of History’s Most Daring Raids
Terminal building of Entebbe airport where hostages were held. Wikimedia

Entebbe Raid

The Entebbe Raid was a rescue mission by Israeli special forces carried out in the wee hours of July 4th, 1976. Its aim was to spring hostages taken from an Air France jetliner that had been commandeered on June 27th, while en route from Tel Aviv to Paris, after a stopover in Athens where it was boarded by four hijackers, two from a breakaway faction of the Popular Front for the Liberation of Palestine (PFLP), and two from a German Red Army Faction revolutionary cell. Seizing the airplane, the hijackers diverted it to Entebbe airport in Uganda, whose president, Idi Amin, was sympathetic to their cause.

Once landed at Entebbe, the hijackers removed the passengers from the airplane to a disused airport terminal building. There, they were joined by an additional 3 accomplices, and after sifting through the passengers’ passports, they released those who were not Israeli or Jewish and kept as hostages 94 who were, plus 12 members of the Air France aircrew. In exchange for freeing the hostages, the hijackers demanded the release of 40 prisoners held in Israel, plus another 13 held in other countries.

As the days passed and the prisoners were not released, the hijackers grew more strident and incessant, vowing to kill the hostages if their demands were not met. Fortunately for the Israelis, an Israeli engineer who had worked with Idi Amin in the 1960s passed furnished them with the blueprints of the Entebbe terminal building where the hostages were being kept, and they used those blueprints to plan a rescue mission. On the night of July 3rd, 100 Israeli special forces boarded C-130 cargo planes and, escorted by F-4 Phantoms, took off on a 2500 mile flight to Uganda.

Within 90 minutes of touching down at Entebbe, the commandos had killed all 7 hostage-takers, along with about 45 Ugandan soldiers, and destroyed 30 Ugandan jets at the airport, for the loss of 1 commando killed and 5 wounded, and 3 hostages dead and 10 wounded. Commandos and hostages then boarded the C-130 transports for a short flight to Nairobi, Kenya, where the planes refueled and the wounded were taken to an awaiting hospital plane, before flying back to Israel.


Read More:

Advertisement